Ms Word How to Vew Final Not Tracked Changes Mac
Turning on Track Changes gives you and your coworkers a way to make changes that are easy to spot. The changes are like suggestions that you can review, and then remove them or make them permanent.

Turn Track Changes on and off
-
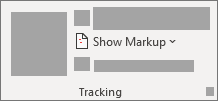
On theReview tab, go to Tracking and selectTrack Changes.

-
When Track Changes is on, deletions are marked with a strikethrough, and additions are marked with an underline. Different authors' changes are indicated with different colors.
-
When Track Changes is off, Word stops marking changes, but the colored underlines and strikethrough from your changes remain in the document until they're accepted or rejected.
-
Note:If the Track Changes feature is unavailable, you might need to turn off document protection. Go to Review > Restrict Editing, and then select Stop Protection. (You might need to provide the document password.)
Show or hide comments or tracked changes
Display all changes inline
The default in Word is to display deletions and comments in balloons in the margins of the document. However, you can change the display to show comments inline and all deletions with strikethroughs instead of inside balloons.
-
On theReview tab, go toTracking.
-
Select Show Markup.
-
Point to Balloons and select Show All Revisions Inline.
View inline comments as ScreenTips.
-
Rest the pointer on a comment in the document. The comment appears in a ScreenTip.
Display changes by type of edit or by reviewer
-
On theReview tab, go toTracking and selectShow Markup .
-
Do one of the following:
-
Select the type of change that you want to display.
For example, select Comments,Insertions and Deletions, or Formatting. The check mark next to the item indicates that the item is selected.

Important:Even if you hide a type of markup by clearing it on the Show Markup menu, the markup automatically appears each time the document is opened by you or a reviewer.
-
Point to Specific People, and then clear all check boxes except the ones next to the names of the reviewers whose changes and comments you want to show.
Note:To select or clear all check boxes for all reviewers in the list, select All Reviewers.
-
Display changes and comments for specific reviewers
An editor or reviewer usually wants to view a document as it will appear after their changes are incorporated. This procedure gives an editor or reviewer the opportunity to see how the document will look with the changes.
-
Go to Review > Tracking > Display for Review.
-
Choose the option you want:
-
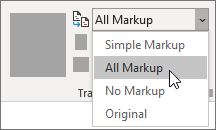
To review the changes, indicated by a red line in the margin, choose Simple Markup.
-
For a detailed view of the changes, choose All Markup.
-
For a preview of how the document will look if you make all the suggested changes permanent, choose No Markup.
-
To view the original document as if all the suggested changes were removed, choose Original.
-
Hide tracked changes and comments when printing
Hiding changes does not remove changes from the document. To remove markup from your document, use the Accept and Reject commands in the Changes group.
-
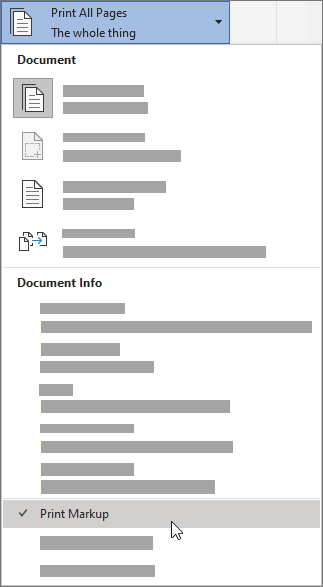
Go toFile > Print > Settings > Print All Pages.
-
Under Document Info, select Print Markup to clear the check mark.
Review, accept, reject, and hide tracked changes
Review a summary of tracked changes
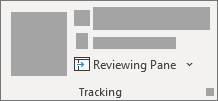
Using the Reviewing Pane you can quickly ensure that all tracked changes have been removed from your document. The summary section at the top of the Reviewing Pane displays the exact number of tracked changes and comments that remain in your document.
The Reviewing Pane also allows you to read long comments that don't fit within a comment bubble.
Note:The Reviewing Pane, unlike the document or the comment bubbles, is not the best tool for making changes to your document. Instead of deleting text or comments or making other changes in the Reviewing Pane, make all editorial changes in the document. The changes will then be visible in the Reviewing Pane.
-
On theReview tab, go toTracking and selectReviewing Pane.
-
Do one of the following:
-
To view the summary at the side of your screen, selectReviewing Pane Vertical.
-
To view the summary across the bottom of your screen, selectReviewing Pane Horizontal.
-
By default, the Reviewing Pane shows at the top how many total revisions are in the document. To see the number and type of the changes, select the carat next to the number of revisions.

Review each tracked change in sequence
-
Click or tap at the beginning of the document.
-
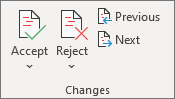
On theReviewtab, go toChanges.
-
Select Acceptor Reject. As you accept or reject changes, Word will move to the next change.
-
Repeat until there are no more tracked changes or comments in your document.
Tip:To review changes in the document without accepting or rejecting them, select Next or Previous.
Accept or reject a single change
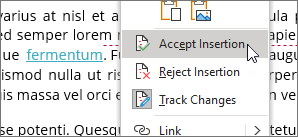
Rather than move through changes in sequence, you can accept or reject a single change. When you accept or reject the change, Word will not move to the next change in the document.
-
Right-click the change and select the option to accept or reject it.
Review changes by type of edit or by a specific reviewer
-
Click or tap at the beginning of the document.
-
On theReview tab, go toTracking.
-
In the Show Markup list, do one of the following:
-
Clear all check boxes except for those next to the types of changes that you want to review.
-
Point toSpecific People, and then clear all check boxes except those next to the names of the reviewers whose changes you want to see or choose All Reviewers to select or clear the check boxes for all reviewers in the list.
-
-
On theReview tab, go toChanges.
-
Select Accept or Reject. As you accept or reject changes, Word will move to the next change.
-
Repeat until you've reviewed all of the changes in your document.
Accept all changes at the same time
-
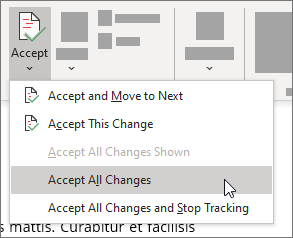
Go toReview > Changes.
-
In the Accept list, selectAccept All Changes or Accept All Changes and Stop Tracking.
Accept or reject all changes at the same time
-
On theReviewtab, go to Changes.
-
Do one of the following:
-
In theAcceptdrop-down list, selectAccept All Changes.
-
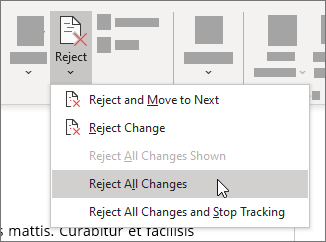
In the Reject drop-down list, select Reject All Changes.
-
Delete comments
-
Select a comment.
-
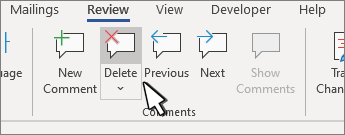
On theReviewtab, go toComments, and select Delete.
-
Click Next or Previous to move to another comment.
Delete all comments
-
Select a comment.
-
On theReviewtab, go to Comments.
-
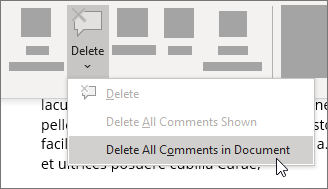
In the Delete drop-down list, select Delete All Comments in Document.
Practice with Track Changes and other collaboration features in Word by downloading this Collaborate in Word learning guide.
When tracked changes are turned on, Word marks any changes made by any authors of the document. This is useful when you're collaborating with other authors because you can see which authors made a particular change.
Turn Track Changes on
-
On the Review tab, turn onTrack Changes.
Word shows changes in the document by displaying a line in the margin. If you switch to All Markup view, you'll see changes inline and in balloons.
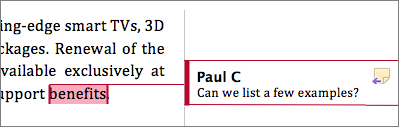
Anytime someone adds a comment, it'll show up in a balloon.
Show changes inline
To see changes inline instead of in balloons, do the following:
-
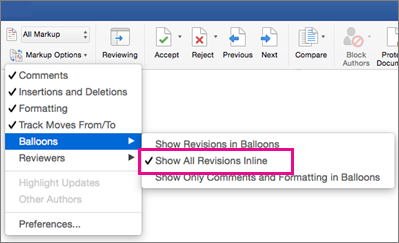
On theReview Tab, selectMarkup Options
-
Point to Balloons and selectShow All Revisions Inline.
Keep Track Changes on
To prevent others from turning off Track Changes, lock Track Changes on with a password.
Important:Be sure to remember the password so you can turn Track Changes off when you're ready to accept or reject the changes.
Lock Track Changes with a password
-
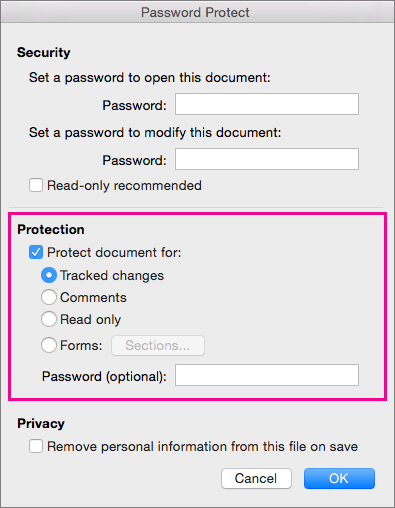
On theTools menu, selectProtect Document.
-
Under Protection, selectProtect document for, and then select Tracked changes
-
In thePassword box, enter a password and select OK.
-
Re-enter your password and select OK.
While tracked changes are locked, you can't turn off change tracking, and you can't accept or reject changes.
Unlock Track Changes
-
On theTools menu, select Protect Document.
-
Under Protection, uncheck Protect document for.
-
Enter your password and select OK.
Track Changes will still be on, but you'll be able to accept and reject changes.
Turn off Track Changes
-
On the Review tab, turn off Track Changes.
Word stops marking up new changes—but all of the changes that were already tracked will still be in the document. For more info, see remove the tracked changes and comments.
Turn tracked changes on or off
When tracked changes are turned on, Word marks any changes made by any authors of the document. This is useful when you're collaborating with other authors because you can see which authors made a particular change.
-
Open the document that you want to edit.
-
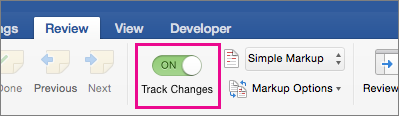
On the Review tab, under Tracking, select the Track Changes switch to turn on track changes.
Tips:
-
Each reviewer's changes are displayed in a different color. If there are more than eight reviewers, Word will reuses colors.
-
To assign a specific color to your own tracked changes, on the Word menu, select Preferences, and then under Output and Sharing, select Track Changes
 . In the Color boxes, select the color that you want.
 -
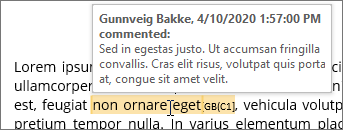
The reviewer's name, the date and time that the change was made, and the kind of change that was made (for example, Deleted) also appear in the markup balloons for each change. If you're not displaying markup balloons, this information appears when you hover over a change.
-
The Highlight Changes options on the Tools > Track Changes menu (Highlight changes on screen, Highlight changes in printed document) and the options on the Review tab pop-up menu (Final Showing Markup, Final, Original Showing Markup, Original) are not saved settings. If you don't want tracked changes to display when you re-open the document, you need to accept or reject the changes. If you want a record of the revisions, save a copy of the document before accepting or rejecting changes.
-
Show tracked changes or comments by type or by reviewer
You can show or hide a document's comments, formatting, insertions, and deletions or view comments for only the reviewers that you select.
-
On the Review tab, go toTracking,
-
In the Show Markup drop-down list, select the option that you want.
Tip:To display a shaded background behind the area where tracked changes or comments appear in the right margin, on the Show Markup pop-up menu, select Markup Area Highlight. This shaded area also prints with your document to help separate the document text from the tracked changes or comments.
Turn off tracked changes in balloons
By default, insertions, deletions, comments, the reviewer's name, and a time stamp are displayed in balloons that appear in the margins of your document. You can change your settings to display tracked changes in the body of the document.
-
Go toReview > Tracking, on the Show Markup pop-up menu, select Preferences.
-
Do one of the following:
| To | Do this |
|---|---|
| Display tracked changes in the body of the document instead of in balloons | Clear the Use balloons to display changes check box. |
| Hide the reviewer's name and the time and date stamp in balloons | Clear the Include reviewer, time stamp, and action buttons check box. |
Note:With balloons turned off, commented text is enclosed in brackets, highlighted by a color, and identified by the reviewer's initials. Comments appear in a small pop-up window when you rest the pointer over commented text, except when your document is in publishing layout view.
Change the formatting of tracked changes
You can customize how revision mark appear and work in Word.
-
On the Review tab, go toTracking.
-
In the Show Markup drop-down list, select Preferences.
-
Select the options you want. The following table lists some frequently used formatting options.
| To | Do this |
|---|---|
| Change the color and other formatting that Word uses to identify changes | Under Markup, select the formatting options that you want on the pop-up menus. |
| Indicate deletions without displaying the text that was deleted | Under Markup, on the Deletions pop-up menu, select # or ^. Deleted text will be replaced with the character # or ^. |
| Alter the appearance of changed lines | Under Markup, on the Changed lines and Colors pop-up menus, select the options that you want. |
| Track text that is moved | Under Moves, select Track moves, and then on the Moved from, Moved to, and Color pop-up menus, select the options that you want. |
| Change the color that Word uses to mark changes that are made to table cells | Under Table cell highlighting, on the Inserted cells, Deleted cells, Merged cells, and Split cells pop-up menus, select the options that you want. |
Review tracked changes and comments
You can review and accept or reject each tracked change in sequence, accept or reject all changes at one time, delete all comments at one time, or review the items that are created by a specific reviewer.
-
If revision marks don't appear in the document, on the Tools menu, point to Track Changes, select Highlight Changes, and then select the Highlight changes on screen check box.
-
Do one of the following:
| To | On the Review tab, do this | Then do this |
|---|---|---|
| Review the next change | Under Changes, select Next | Select Accept or Reject. |
| Review the previous change | Under Changes, select Previous | Select Accept or Reject. |
| Accept all changes at one time | Under Changes, select the arrow next to Accept | Select Accept All Changes in Document. |
| Reject all changes at one time | Under Changes, select the arrow next to Reject | Select Reject All Changes in Document. |
| Delete all comments at one time | Under Comments, select the arrow next to Delete | Select Delete All Comments in Document. |
| Review items created by a specific reviewer | Under Tracking, select Show Markup | Point to Reviewers, and then clear all check marks except the one next to the name of the reviewer whose changes you want to review. To select or clear the check boxes for all reviewers in the list, select All Reviewers. |
Note:When you rest the pointer on a tracked change, a ScreenTip appears that displays the author's name, the date and time of the change, and the kind of change that was made.
Print tracked changes
Tracked changes can be useful to include in a printed version of a document.
-
Open the document that contains the tracked changes that you want to print.
-
On theFile menu, selectPrint.
-
On the Copies & Pages pop-up menu, select Microsoft Word.
Tip:If you don't see the Copies & Pages pop-up menu, select the blue downward facing arrow to the right of the Printer pop-up menu.
-
On the Print What pop-up menu, select Document showing markup.
Turn on Track Changes
You can set Word for the Web to track changes for all users who are collaborating on the document or to track just your changes.
-
On theReview tab, go toTracking.
-
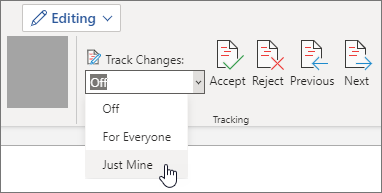
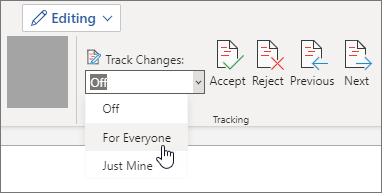
In the Track Changes drop-down list, do one of the following:
-
To track only the changes you make to the document, selectJust Mine.
-
To track changes to the document made by all users, select For Everyone.
-
Turn off Track Changes
-
On theReview tab, go toTracking.
-
In theTrack Changes drop-down list, selectOff.

Review, accept, or reject changes
You can review each tracked change in sequence and decide whether to accept or reject the change.
-
Click or tap at the beginning of the document.
-
On theReview tab, go toTracking.
-
Select Accept or Reject. As you accept or reject changes, Word will move to the next change.

Tip:To review changes in the document without accepting or rejecting them, select Next or Previous.
-
Repeat until you've reviewed all of the changes in your document.
Accept or reject a single change
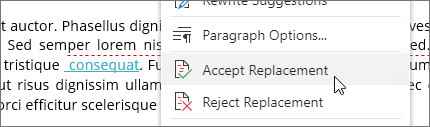
Rather than move through changes in sequence, you can accept or reject a single change. When you accept or reject the change, Word will not move to the next change in the document.
-
Right-click the change and select the option to accept or reject it.
Turn Track Changes on or off (Word for iPad)
-
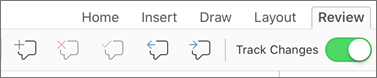
Tap the Review tab.
-
Tap the control next toTrack Changes to turn Track Changes on or off.
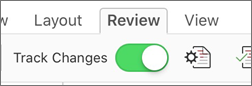
Show or hide markup (Word for iPad)
-
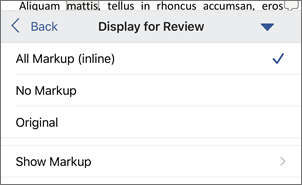
On the Review tab, tap the Display for Review icon.
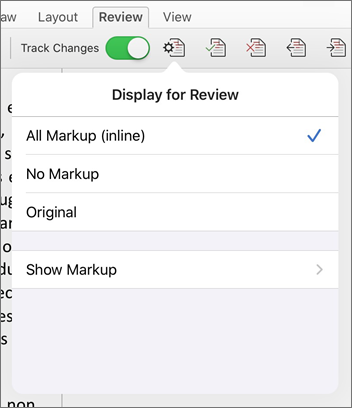
-
In the Display for Review list, tap the option you want:
-
All Markup (inline) shows the final document with tracked changes visible inline
-
No markup shows the final document without tracked changed
-
Original shows the original document with no tracked changes
-
Show tracked changes by type (Word for iPad)
-
On the Review tab, tap the Display for Review icon.
-
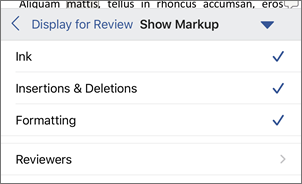
In the Display for Review list, tap Show Markup.
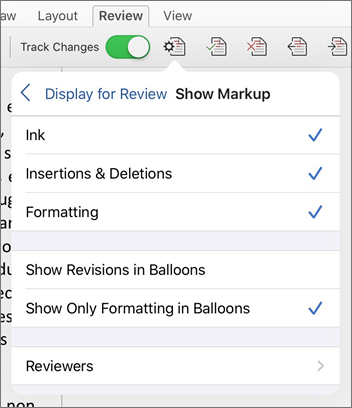
-
In the Show Markup list, tap the option you want:
-
Ink shows or hides any marks made by digital inking in the document.
-
Insertions & Deletions shows or hides inserted or deleted text.
-
Formatting shows or hides formatting changes.
-
Show Revisions in Balloons shows changes in balloons in the right margin.
-
Show Only Formatting in Balloons shows only formatting changes in balloons and keeps the other changes as inline tracking.
-
Show tracked changes by reviewer (Word for iPad)
If there are multiple reviewers for the document, Word will show all changes by default. However, you can choose to show only changes made by specific viewers.
-
On the Review tab, tap the Display for Review icon.
-
In the Display for Review list, tap Show Markup.
-
In the Show Markup list, tap Reviewers.
-
In the Other Authors list, tap the names of the reviewers whose changes you want to see or tap All Reviewers.
Accept changes (Word for iPad)
-
Tap twice on a change in the document to select it.
-
On the Review tab, tap the Accept icon.
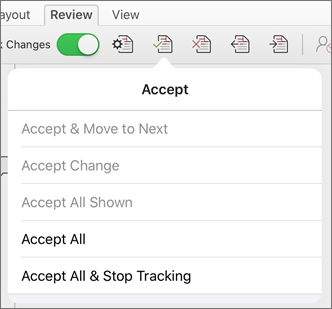
-
Do one of the following:
-
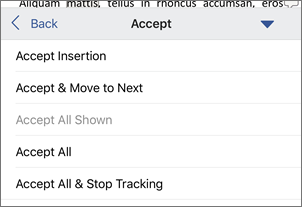
TapAccept & Move to Next to accept the change and move to the next change in the document.
-
TapAccept Deletion, Accept Insertion, or Accept Change to accept the selected change, identified contextually by type, and not move to the next change in the document.
-
TapAccept All Shown to accept all changes that are visible, but not changes that are hidden. For example, if you're viewing only changes made by a specific reviewer, tapping Accept All Shown accepts only the changes made by that reviewer.
-
TapAccept All to accept all changes in the document.
-
TapAccept All & Stop Tracking to accept all changes in the document and turn off Track Changes.
-
-
To move to another change without accepting or rejecting it, tap the Previous or Next icon.
Reject changes (Word for iPad)
-
Tap twice on a change in the document to select it.
-
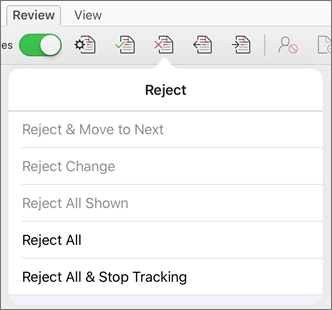
On the Review tab, tap the Rejecticon.
-
Do one of the following:
-
TapReject & Move to Next to reject the change and move to the next change in the document.
-
TapReject Deletion, Reject Insertion, or Reject Change to reject the selected change, identified contextually by type, and not move to the next change in the document.
-
TapReject All Shown to reject all changes that are visible, but not changes that are hidden. For example, if you're viewing only changes made by a specific reviewer, tapping Reject All Shown rejects only the changes made by that reviewer.
-
TapReject All to reject all changes in the document.
-
TapRejects All & Stop Tracking to reject all changes in the document and turn off Track Changes.
-
-
To move to another change without accepting or rejecting it, tap the Previous or Next icon.
Delete comments (Word for iPad)
-
Tap twice on a comment in the document to select it.
-
Tap the Review tab.
-
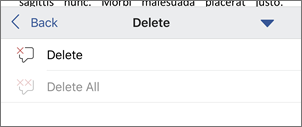
Tap the Delete icon to delete the comment or press and hold the Delete icon until the Delete list appears, and then do one of the following:
-
Tap Delete to delete only the selected comment.
-
Tap Delete All to delete all comments in the document.
-
-
To move to another comment without deleting it, tap the Previous or Next icon.
Turn Track Changes on or off (Word for iPhone)
-
Tap the pen icon at the top to open the ribbon.
-
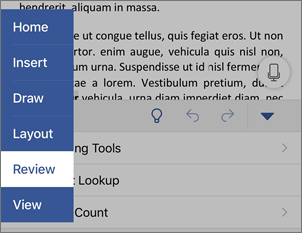
Tap the Review tab.
-
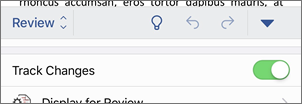
Tap the control next to Track Changes to turn Track Changes on or off.
Show or hide markup (Word for iPhone)
-
On the Review tab, tap Display for Review.
-
Tap the option you want:
-
All Markup (inline) shows the final document with tracked changes visible inline
-
No markup shows the final document without tracked changed
-
Original shows the original document with no tracked changes
-
Show tracked changes by type (Word for iPhone)
-
On the Review tab, tap Display for Review.
-
Tap Show Markup.
-
In the Show Markup list, tap the option you want:
-
Ink shows or hides any marks made by digital inking in the document.
-
Insertions & Deletions shows or hides inserted or deleted text.
-
Formatting shows or hides formatting changes.
-
Show tracked changes by reviewer (Word for iPhone)
If there are multiple reviewers for the document, Word will show all changes by default. However, you can choose to show only changes made by specific viewers.
-
On the Review tab, tap Display for Review.
-
Tap Show Markup.
-
Tap Reviewers.
-
In the Other Authors list, tap the names of the reviewers whose changes you want to see or tap All Reviewers.
Accept changes (Word for iPhone)
-
Tap twice on a change in the document to select it.
-
On the Review tab, tap Accept.
-
Do one of the following:
-
TapAccept & Move to Next to accept the change and move to the next change in the document.
-
TapAccept Deletion, Accept Insertion, or Accept Change to accept the selected change, identified contextually by type, and not move to the next change in the document.
-
TapAccept All Shown to accept all changes that are visible, but not changes that are hidden. For example, if you're viewing only changes made by a specific reviewer, tapping Accept All Shown accepts only the changes made by that reviewer.
-
TapAccept All to accept all changes in the document.
-
TapAccept All & Stop Tracking to accept all changes in the document and turn off Track Changes.
-
Reject changes (Word for iPhone)
-
Tap twice on a change in the document to select it.
-
On the Review tab, tapReject.

-
Do one of the following:
-
TapReject & Move to Next to reject the change and move to the next change in the document.
-
TapReject Deletion, Reject Insertion, or Reject Change to reject the selected change, identified contextually by type, and not move to the next change in the document.
-
TapReject All Shown to reject all changes that are visible, but not changes that are hidden. For example, if you're viewing only changes made by a specific reviewer, tapping Reject All Shown rejects only the changes made by that reviewer.
-
TapReject All to reject all changes in the document.
-
TapReject All & Stop Tracking to reject all changes in the document and turn off Track Changes.
-
Delete comments (Word for iPhone)
-
Tap twice on a comment in the document to select it.
-
One the Review tab, tap Delete,and then do one of the following:
-
Tap Delete to delete only the selected comment.
-
Tap Delete All to delete all comments in the document.
-
-
To move to another comment without deleting it, tap the Previous or Next icon.
Ms Word How to Vew Final Not Tracked Changes Mac
Source: https://support.microsoft.com/en-us/office/track-changes-in-word-197ba630-0f5f-4a8e-9a77-3712475e806a
Enregistrer un commentaire for "Ms Word How to Vew Final Not Tracked Changes Mac"